
न्यूमॉर्फिज्म एक नई डिजाइन प्रवृत्ति है जो फ्लैट डिजाइन और स्क्यूओमोर्फिज्म को जोड़ती है। यह एक सॉफ्ट, एक्सट्रूडेड प्लास्टिक, लगभग 3डी-स्टाइल लुक के साथ डिजाइन करने का एक न्यूनतम तरीका है। वर्तमान में, यह डिज़ाइन इंटरनेट पर ट्रेंड कर रहा है और इसका व्यापक रूप से डिजाइनरों और डेवलपर्स द्वारा उपयोग किया जाता है।
यदि आप अपने अगले प्रोजेक्ट के लिए न्यूमॉर्फिज्म को आजमाना चाहते हैं, तो शुरू करने के लिए यहां कुछ कोड स्निपेट दिए गए हैं।
1. न्यूमॉर्फिक कार्ड
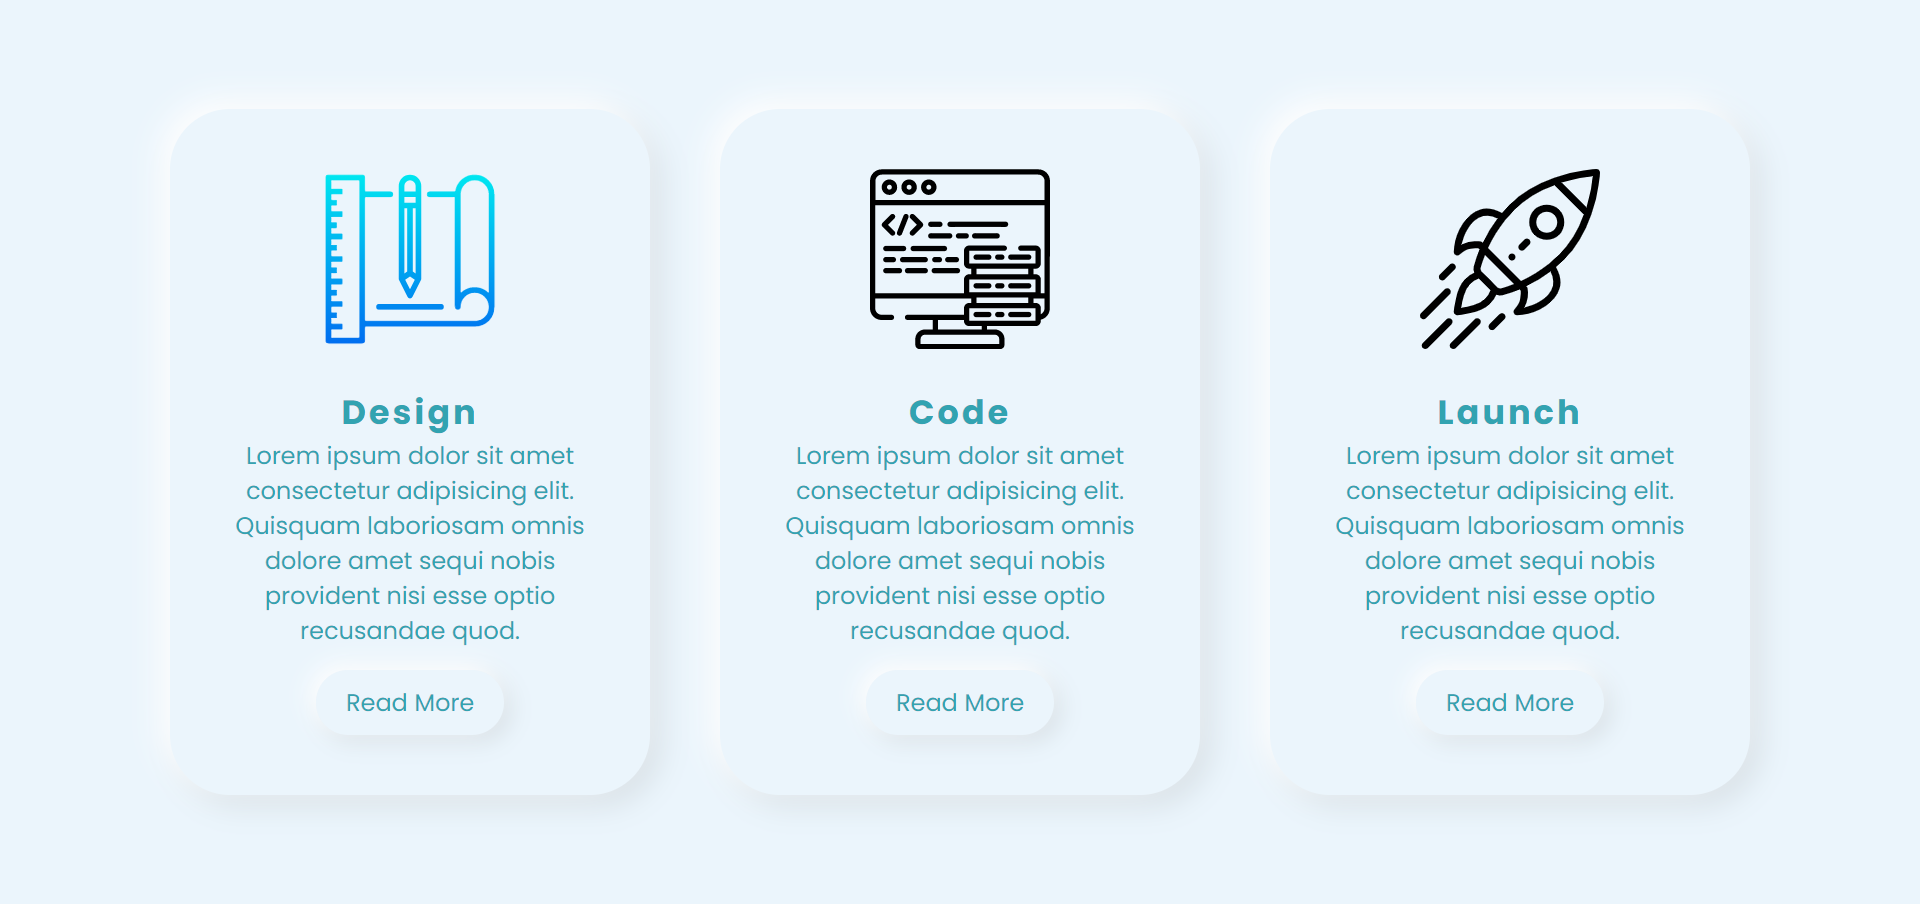
उपरोक्त न्यूमॉर्फिक कार्ड बनाने के लिए निम्नलिखित HTML और CSS कोड स्निपेट का उपयोग करें।
HTML कोड
 <!DOCTYPE html>
 <html lang="en" dir="ltr">
 <head>
 <meta charset="utf-8">
 <title>Neumorphic Cards</title>
 <link rel="stylesheet" href="styles.css">
 </head>
 <body>
 <div class="container">
 <div class="card">
 <div class="imgBx">
 <img src="https://image.flaticon.com/icons/svg/2092/2092063.svg" alt="">
 </div>
 <div class="contentBx">
 <h2>Design</h2>
 <p>Lorem ipsum dolor sit amet consectetur adipisicing elit. Quisquam laboriosam omnis dolore amet sequi nobis provident nisi esse optio recusandae quod.</p>
 <a href=""><span>Read More</span></a>
 </div>
 </div>
 <div class="card">
 <div class="imgBx">
 <img src="https://image.flaticon.com/icons/svg/1197/1197460.svg" alt="">
 </div>
 <div class="contentBx">
 <h2>Code</h2>
 <p>Lorem ipsum dolor sit amet consectetur adipisicing elit. Quisquam laboriosam omnis dolore amet sequi nobis provident nisi esse optio recusandae quod.</p>
 <a href=""><span>Read More</span></a>
 </div>
 </div>
 <div class="card">
 <div class="imgBx">
 <img src="https://image.flaticon.com/icons/svg/1067/1067256.svg" alt="">
 </div>
 <div class="contentBx">
 <h2>Launch</h2>
 <p>Lorem ipsum dolor sit amet consectetur adipisicing elit. Quisquam laboriosam omnis dolore amet sequi nobis provident nisi esse optio recusandae quod.</p>
 <a href=""><span>Read More</span></a>
 </div>
 </div>
 </div>
 </body>
 </html>
सीएसएस कोड
 @import url('https://fonts.googleapis.com/css?family=Poppins:400,500,600,700,800,900&display=swap');
 *
 {
 margin: 0;
 padding: 0;
 box-sizing: border-box;
 font-family: 'Poppins', sans-serif;
 }
 body
 {
 display: flex;
 justify-content: center;
 align-items: center;
 min-height: 100vh;
 background: #ebf5fc;
 }
 .container
 {
 position: relative;
 display: flex;
 justify-content: space-around;
 align-items: center;
 flex-wrap: wrap;
 width: 1100px;
 }
 .container .card
 {
 width: 320px;
 margin: 20px;
 padding: 40px 30px;
 background: #ebf5fc;
 border-radius: 40px;
 box-shadow: -6px -6px 20px rgba(255,255,255,1), 6px 6px 20px rgba(0,0,0,0.1);
 }
 .container .card:hover
 {
 box-shadow: inset -6px -6px 20px rgba(255,255,255,0.5), inset 6px 6px 20px rgba(0,0,0,0.05);
 }
 .container .card .imgBx
 {
 position: relative;
 text-align: center;
 }
 .container .card .imgBx img
 {
 max-width: 120px;
 }
 .container .card .contentBx
 {
 position: relative;
 margin-top: 20px;
 text-align: center;
 }
 .container .card .contentBx h2
 {
 color: #32a3b1;
 font-weight: 700;
 font-size: 1.4em;
 letter-spacing: 2px;
 }
 .container .card .contentBx p
 {
 color: #32a3b1;
 }
 .container .card .contentBx a
 {
 display: inline-block;
 padding: 10px 20px;
 margin-top: 15px;
 border-radius: 40px;
 color: #32a3b1;
 font-size: 16px;
 text-decoration: none;
 box-shadow: -4px -4px 15px rgba(255,255,255,1), 4px 4px 15px rgba(0,0,0,0.1);
 }
 .container .card .contentBx a:hover
 {
 box-shadow: inset -4px -4px 10px rgba(255,255,255,0.5), inset 4px 4px 10px rgba(0,0,0,0.1);
 }
 .container .card a:hover span
 {
 display: block;
 transform: scale(0.98);
 }
 .container .card:hover .imgBx,
 .container .card:hover .contentBx
 {
 transform: scale(0.98);
 }
2. न्यूमॉर्फिक फॉर्म
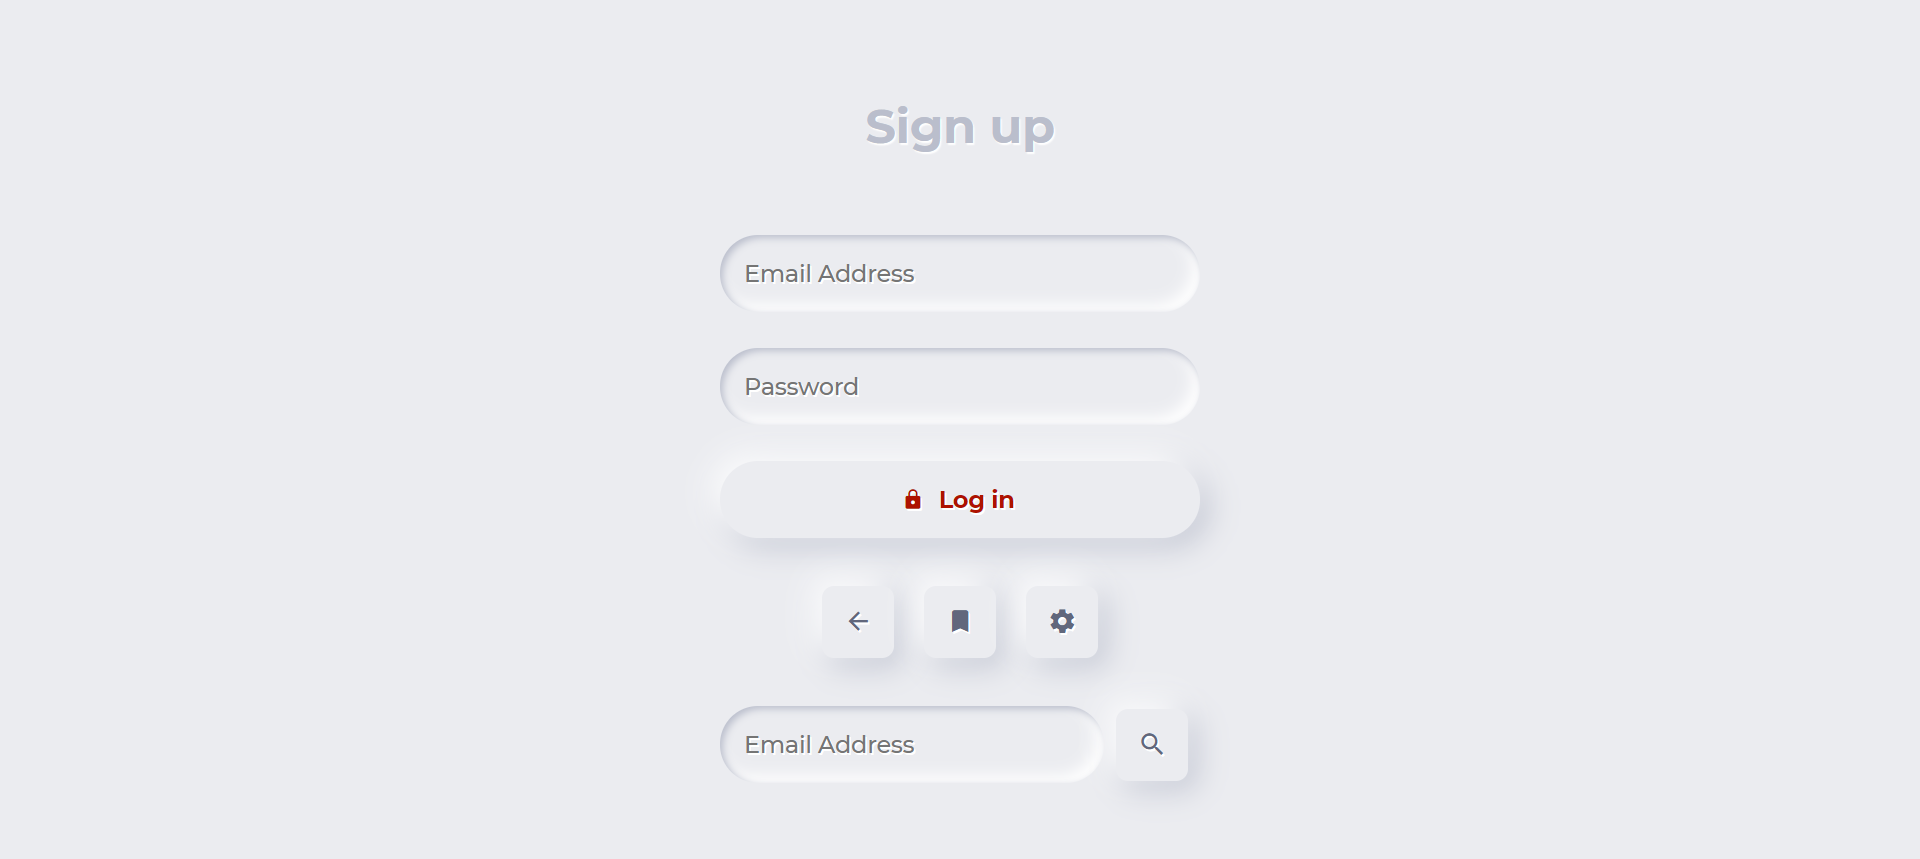
उपरोक्त न्यूमॉर्फिक फॉर्म बनाने के लिए निम्नलिखित HTML और CSS कोड स्निपेट का उपयोग करें।
HTML कोड
<!DOCTYPE html>
<html lang="en" dir="ltr">
<head>
<meta charset="utf-8">
<title>Neumorphic Form</title>
<link rel="stylesheet" href="https://unpkg.com/[email protected]/dist/css/ionicons.min.css">
<style>
@import url('https://fonts.googleapis.com/css?family=Montserrat:500,700&display=swap');
</style>
<link rel="stylesheet" href="styles.css">
</head>
<body>
<form>
<div class="segment">
<h1>Sign up</h1>
</div>
<label>
<input type="text" placeholder="Email Address" />
</label>
<label>
<input type="password" placeholder="Password" />
</label>
<button class="red" type="button"><i class="icon ion-md-lock"></i> Log in</button>
<div class="segment">
<button class="unit" type="button"><i class="icon ion-md-arrow-back"></i></button>
<button class="unit" type="button"><i class="icon ion-md-bookmark"></i></button>
<button class="unit" type="button"><i class="icon ion-md-settings"></i></button>
</div>
<div class="input-group">
<label>
<input type="text" placeholder="Email Address" />
</label>
<button class="unit" type="button"><i class="icon ion-md-search"></i></button>
</div>
</form>
</body>
</html>
सीएसएस कोड
 body, html {
 background-color: #EBECF0;
 }
 body, p, input, select, textarea, button {
 font-family: "Montserrat", sans-serif;
 letter-spacing: -0.2px;
 font-size: 16px;
 }
 div, p {
 color: #BABECC;
 text-shadow: 1px 1px 1px #FFF;
 }
 form {
 padding: 16px;
 width: 320px;
 margin: 0 auto;
 }
 .segment {
 padding: 32px 0;
 text-align: center;
 }
 button, input {
 border: 0;
 outline: 0;
 font-size: 16px;
 border-radius: 320px;
 padding: 16px;
 background-color: #EBECF0;
 text-shadow: 1px 1px 0 #FFF;
 }
 label {
 display: block;
 margin-bottom: 24px;
 width: 100%;
 }
 input {
 margin-right: 8px;
 box-shadow: inset 2px 2px 5px #BABECC, inset -5px -5px 10px #FFF;
 width: 100%;
 box-sizing: border-box;
 transition: all 0.2s ease-in-out;
 appearance: none;
 -webkit-appearance: none;
 }
 input:focus {
 box-shadow: inset 1px 1px 2px #BABECC, inset -1px -1px 2px #FFF;
 }
 button {
 color: #61677C;
 font-weight: bold;
 box-shadow: -5px -5px 20px #FFF, 5px 5px 20px #BABECC;
 transition: all 0.2s ease-in-out;
 cursor: pointer;
 font-weight: 600;
 }
 button:hover {
 box-shadow: -2px -2px 5px #FFF, 2px 2px 5px #BABECC;
 }
 button:active {
 box-shadow: inset 1px 1px 2px #BABECC, inset -1px -1px 2px #FFF;
 }
 button .icon {
 margin-right: 8px;
 }
 button.unit {
 border-radius: 8px;
 line-height: 0;
 width: 48px;
 height: 48px;
 display: inline-flex;
 justify-content: center;
 align-items: center;
 margin: 0 8px;
 font-size: 19.2px;
 }
 button.unit .icon {
 margin-right: 0;
 }
 button.red {
 display: block;
 width: 100%;
 color: #AE1100;
 }
 .input-group {
 display: flex;
 align-items: center;
 justify-content: flex-start;
 }
 .input-group label {
 margin: 0;
 flex: 1;
 }
3. न्यूमॉर्फिक नवबार
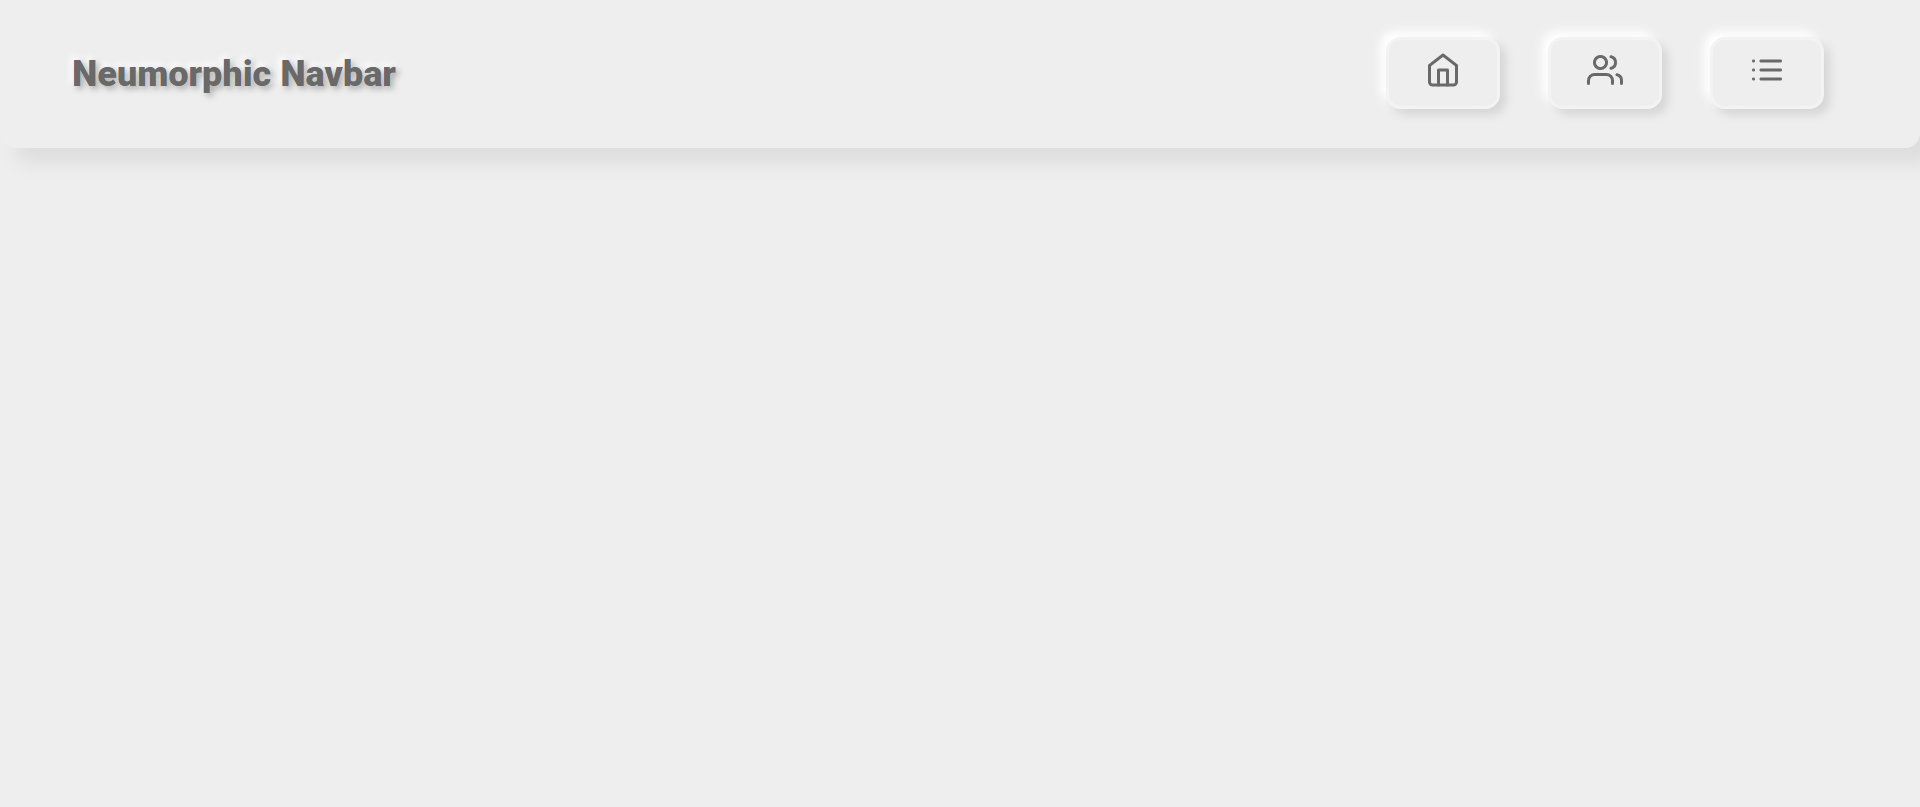
उपरोक्त न्यूमॉर्फिक नावबार बनाने के लिए निम्नलिखित HTML, CSS और जावास्क्रिप्ट कोड स्निपेट का उपयोग करें।
HTML कोड
<!DOCTYPE html>
<html lang="en" dir="ltr">
<head>
<meta charset="utf-8">
<title>Neumorphic Navbar</title>
<style>
@import url('https://fonts.googleapis.com/css?family=Roboto:400,900&display=swap');
</style>
<link rel="stylesheet" href="styles.css">
</head>
<body>
<ul class="nav">
<li class="logo">Neumorphic Navbar</li>
<li tabindex="0"><i data-feather="home"></i></li>
<li tabindex="0"><i data-feather="users"></i></li>
<li tabindex="0"><i data-feather="list"></i></li>
</ul>
<script src="https://cdnjs.cloudflare.com/ajax/libs/feather-icons/4.24.1/feather.min.js"></script>
<script type="text/javascript" src="script.js"></script>
</body>
</html>
सीएसएस कोड
 * {
 margin: 0;
 padding: 0;
 box-sizing: border-box;
 }
 body {
 background-color: #efeeee;
 }
 .nav {
 width: 100vw;
 height: 100px;
 background-color: #efeeee;
 box-shadow: 10px 10px 12px 0 rgba(0, 0, 0, 0.07);
 border-radius: 0 0 10px 10px;
 display: flex;
 justify-content: flex-end;
 align-items: center;
 padding: 0 3rem;
 list-style-type: none;
 }
 .nav li.logo {
 margin-right: auto;
 font-family: "Roboto", sans-serif;
 font-size: 1.5rem;
 color: dimgray;
 font-weight: 900;
 text-shadow: 2px 2px 4px rgba(0, 0, 0, 0.3), -2px -2px 4px white;
 }
 .nav li:not(.logo) {
 margin: 0 1rem;
 padding: 0.5rem 1.5rem;
 border: 2px solid rgba(255, 255, 255, 0.3);
 box-shadow: 4px 4px 6px 0 rgba(0, 0, 0, 0.1), -4px -4px 6px white;
 border-radius: 10px;
 font-family: "Roboto", sans-serif;
 cursor: pointer;
 transition: color 0.2s ease-out, transform 0.2s ease-out;
 color: dimgray;
 }
 .nav li:not(.logo):hover {
 transform: scale(1.05);
 box-shadow: 4px 4px 10px 0 rgba(0, 0, 0, 0.1), -4px -4px 10px white;
 }
 .nav li:not(.logo):focus {
 outline: none;
 transform: scale(0.95);
 box-shadow: 4px 4px 10px 0 rgba(0, 0, 0, 0.1), -4px -4px 10px white, 4px 4px 10px 0 rgba(0, 0, 0, 0.1) inset, -4px -4px 10px white inset;
 }
 .nav li:not(.logo):hover, .nav li:not(.logo):focus {
 color: orangered;
 }
जावास्क्रिप्ट कोड
feather.replace();
4. न्यूमॉर्फिक टेक्स्ट और आकार
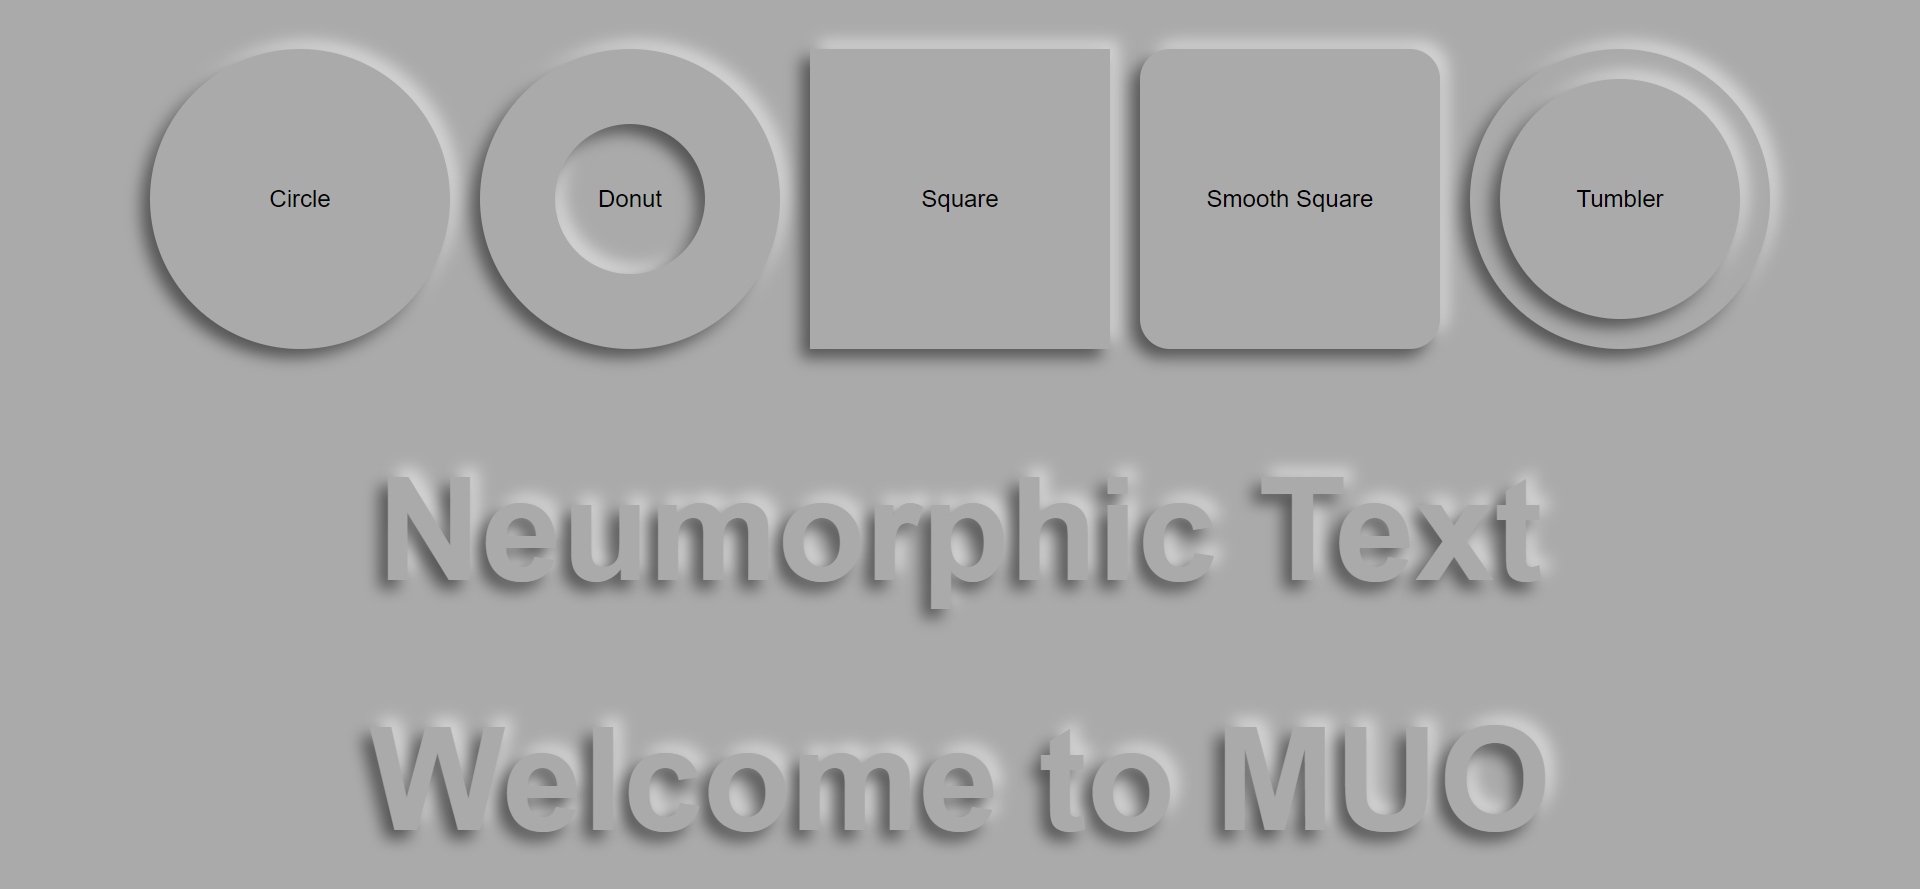
उपरोक्त न्यूमॉर्फिक टेक्स्ट और आकार बनाने के लिए निम्नलिखित HTML और CSS कोड स्निपेट का उपयोग करें।
HTML कोड
 <!DOCTYPE html>
 <html lang="en" dir="ltr">
 <head>
 <meta charset="utf-8">
 <title>Neumorphic Text and Shapes</title>
 <link rel="stylesheet" href="styles.css">
 </head>
 <body>
 <div class="n-outset n-circle">Circle</div>
 <div class="n-outset n-donut"><div class="n-inset">Donut</div></div>
 <div class="n-outset n-square">Square</div>
 <div class="n-outset n-smooth-sq">Smooth Square</div>
 <div class="n-outset n-tumbler"><div class="n-outset">Tumbler</div></div>
 <div class="n-text">Neumorphic Text</div>
 <div class="n-text">Welcome to MUO</div>
 </script>
 </body>
 </html>
सीएसएस कोड
 *, *::before, *::after {
 box-sizing: border-box;
 }
 :root {
 --nColor: #aaa;
 --brShadow: -6px 6px 10px rgba(0,0,0,0.5);
 --tlShadow: 6px -6px 10px rgba(255,255,255,0.5);
 }
 body {
 margin: 0;
 font-family: sans-serif;
 min-height: 100vh;
 display: flex;
 align-items: center;
 justify-content: center;
 flex-wrap: wrap;
 background: var(--nColor);
 }
 .n-outset,
 .n-inset {
 display: flex;
 align-items: center;
 justify-content: center;
 }
 .n-circle {
 background-color: var(--nColor);
 box-shadow: var(--brShadow), var(--tlShadow);
 border-radius: 50%;
 width: 200px;
 height: 200px;
 margin: 10px;
 }
 .n-donut {
 background-color: var(--nColor);
 box-shadow: var(--brShadow), var(--tlShadow);
 border-radius: 50%;
 width: 200px;
 height: 200px;
 margin: 10px;
 }
 .n-donut .n-inset {
 background-color: var(--nColor);
 box-shadow: inset var(--brShadow), inset var(--tlShadow);
 border-radius: 50%;
 width: 50%;
 height: 50%;
 margin: 0;
 }
 .n-tumbler {
 background-color: var(--nColor);
 box-shadow: var(--brShadow), var(--tlShadow);
 border-radius: 50%;
 width: 200px;
 height: 200px;
 margin: 10px;
 }
 .n-tumbler .n-outset {
 background-color: var(--nColor);
 box-shadow: var(--brShadow), var(--tlShadow);
 border-radius: 50%;
 width: 80%;
 height: 80%;
 margin: 0;
 }
 .n-square {
 background-color: var(--nColor);
 box-shadow: var(--brShadow), var(--tlShadow);
 border-radius: 0;
 width: 200px;
 height: 200px;
 margin: 10px;
 }
 .n-smooth-sq {
 background-color: var(--nColor);
 box-shadow: var(--brShadow), var(--tlShadow);
 border-radius: 10%;
 width: 200px;
 height: 200px;
 margin: 10px;
 }
 .n-text {
 color: var(--nColor);
 text-shadow: var(--brShadow), var(--tlShadow);
 font-size: 6em;
 font-weight: bold;
 }
5. न्यूमॉर्फिक बटन
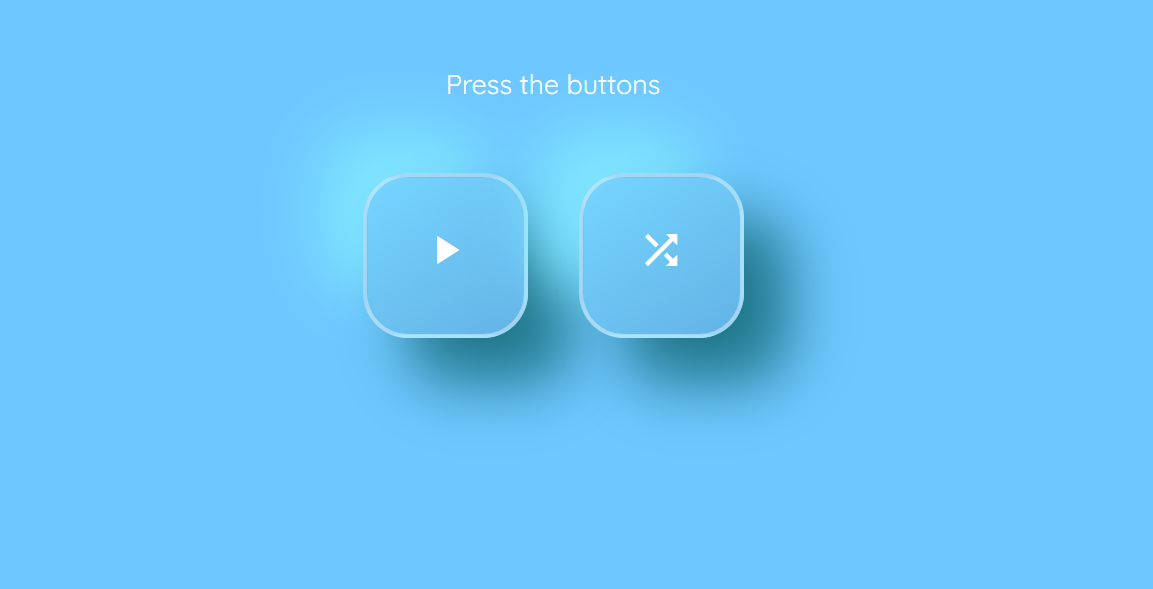
उपरोक्त न्यूमॉर्फिक बटन बनाने के लिए निम्नलिखित HTML, CSS और जावास्क्रिप्ट कोड स्निपेट का उपयोग करें।
HTML कोड
 <!DOCTYPE html>
 <html lang="en" dir="ltr">
 <head>
 <meta charset="utf-8">
 <title>Neumorphic Buttons</title>
 <link href="https://fonts.googleapis.com/css?family=Quicksand&display=swap" rel="stylesheet">
 <link rel="stylesheet" href="styles.css">
 </head>
 <body>
 <div class="btn-holder">
 <p class="intro-text">Press the buttons</p>
 <button id="play-pause" onclick="changeStyle('play-pause')" aria-label="Play/Pause Button." class="btn neumorphic">
 <span class="icon">
 <i id="play" class="material-icon">
 play_arrow
 </i>
 <i id="pause" class="material-icon">
 pause
 </i>
 </span>
 </button>
 <button id="shuffle-btn" onclick="changeStyle('shuffle-btn')" aria-label="Shuffle Button." class="btn neumorphic">
 <i id="shuffle" class="material-icon">
 shuffle
 </i>
 </button>
 </div>
 <script type="text/javascript" src="script.js"></script>
 </body>
 </html>
सीएसएस कोड
 @import url('https://fonts.googleapis.com/icon?family=Material+Icons');
 body{
 background-color: #6ec7ff;
 }
 .btn-holder{
 display: block;
 margin: 0 auto;
 margin-top: 64px;
 text-align: center;
 }
 .intro-text{
 margin-bottom: 48px;
 font-family: 'Quicksand', sans-serif;
 color: white;
 font-size: 18px;
 }
 .btn{
 width: 110px;
 height: 110px;
 font-size: 30px;
 border-radius: 30px;
 border: none;
 color: white;
 vertical-align: top;
 -webkit-transition: .6s ease-in-out;
 transition: .6s ease-in-out;
 }
 .btn:hover{
 cursor: pointer;
 }
 .btn:focus{
 outline: none;
 }

 .btn:first-of-type{
 margin-right: 30px;
 }

 .neumorphic{
 background: linear-gradient(145deg, #76d5ff, #63b3e6);
 box-shadow: 30px 30px 40px #1e7689,
 -30px -30px 40px #7fe5ff;
 border: 3px solid rgba(255, 255, 255, .4);
 }
 .neumorphic-pressed{
 background: linear-gradient(145deg, #63b3e6, #76d5ff);
 -webkit-box-shadow: inset 15px 15px 20px -20px rgba(0,0,0,.5);
 -moz-box-shadow: inset 15px 15px 20px -20px rgba(0,0,0,.5);
 box-shadow: inset 15px 15px 20px -20px rgba(0,0,0,.5);
 }
 .neumorphic:focus, .neumorphic:hover, .neumorphic:focus, .neumorphic:hover, .neumorphic-pressed:focus, .neumorphic-pressed:hover {
 border: 3px solid rgba(46, 74, 112, .75);
 }

 .material-icon {
 font-family: 'Material Icons';
 font-weight: normal;
 font-style: normal;
 font-size: 32px;
 display: inline-block;
 line-height: 1;
 text-transform: none;
 letter-spacing: normal;
 word-wrap: normal;
 white-space: nowrap;
 direction: ltr;
 -webkit-font-smoothing: antialiased;
 text-rendering: optimizeLegibility;
 -moz-osx-font-smoothing: grayscale;
 font-feature-settings: 'liga';
 }
 #pause {
 color: #143664;
 display: none;
 }
जावास्क्रिप्ट कोड
 function changeStyle(btnPressed) {
 var btn = document.getElementById(btnPressed);
 btn.classList.toggle("neumorphic");
 btn.classList.toggle("neumorphic-pressed");
 if (btnPressed === 'play-pause') {
 play();
 } else if (btnPressed === 'shuffle-btn') {
 shuffle();
 }
 }
 function play() {
 var playBtn = document.getElementById('play');
 var pauseBtn = document.getElementById('pause');
 if (playBtn.style.display === 'none') {
 playBtn.style.display = 'block';
 pauseBtn.style.display = 'none';
 } else {
 playBtn.style.display = 'none';
 pauseBtn.style.display = 'block';
 }
 }
 function shuffle() {
 var shuffleBtn = document.getElementById('shuffle-btn');
 if (shuffleBtn.style.color == 'white' || shuffleBtn.style.color == '') {
 shuffleBtn.style.color = '#143664';
 } else {
 shuffleBtn.style.color = 'white';
 }
 }
यदि आप इस लेख में उपयोग किए गए संपूर्ण स्रोत कोड को देखना चाहते हैं, तो यहां GitHub रिपॉजिटरी है ।
नोट : इस आलेख में प्रयुक्त कोड एमआईटी लाइसेंस प्राप्त है ।
न्यूमॉर्फिज्म के साथ अपनी वेबसाइट को स्टाइल करें
आप अपनी वेबसाइट को स्टाइल करने के लिए न्यूमॉर्फिज्म की न्यूनतर डिजाइन अवधारणा का उपयोग कर सकते हैं। यह सौंदर्य की दृष्टि से मनभावन लुक प्रदान करता है। लेकिन फिर भी, न्यूमॉर्फिज्म की पहुंच सीमाएं हैं।
वेबसाइट को खूबसूरत लुक देने के लिए अलग-अलग तरीके हैं। अगर आप अपनी वेबसाइट पर ब्लैंड बॉक्स स्टाइल करना चाहते हैं, तो बॉक्स-शैडो CSS प्रॉपर्टी को आज़माएँ।